If your model is made entirely of plastic, congratulations! You get to immediately start cutting things up! Metal models have an oily residue on them from the manufacturing process that should to be cleaned off before you assemble and paint. Plastic models on the other hand don’t suffer from this. Well, actually they do but the chemical composition of the plastics release agent is different than that of metals. The effect it has on paint is almost negligible. There are camps out there that believe you should wash your plastic models before just like metals but in my experience (I’ve never washed a plastic model) it’s never been an issue.
 START CHOPPIN’
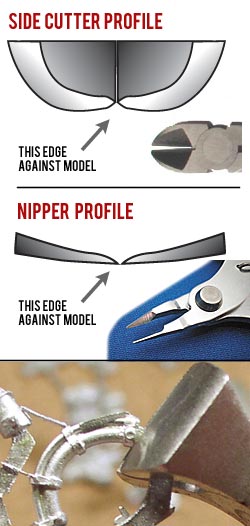
Removing the parts from the sprue, whether metal or plastic, should be the same. You can use an X-Acto or hobby knife but a nipper or side cutter is better for a number of reasons.
Safety First! Some sprues have quite a large area holding the part on. Using an X-Acto to remove these parts is hazardous to the piece at best and hazardous to yourself at worst. Just one slip while you’re putting enough pressure to cut through that much plastic or metal can lead to ruining a part or even getting stitches. It’s happened!
Using a miniature side cutting pliers is good – a nipper, better. A side cutter is typically bigger than a nipper and can possibly move along the seam attaching the part to the sprue and cause deformity in the plastic. Using a nipper nearly eliminates this and leaves a smaller piece of excess plastic which is easier to remove. Always place the flattest side of the cutters against the model. This will give you the closest cut and leave less for you to clean or sand off.
Of course, if your model is a single piece, these last two paragraphs don’t matter.
 CLEANUP
Now that everything is free of their sprues, it’s time clean up. This can be the most boring part of modeling (and frustrating if it’s poorly cast) but a little diligence and patience pays off in the end.
The most common corrections you’ll have to make here are for mould lines and flash.
Mould lines are caused by the moulds not lining up perfectly during the injection process, or if they are getting old and worn out. Mold lines are easier to see on plastic models than metal ones and sometimes priming a model very lightly will make unseen mold lines pop out. Many of the newer models (at least from Games Workshop’s Citadel line) are sculpted in a way to hide mould line should they appear. An older model that’s used the same mould will tend to pick up these lines as it the mould wears out. Which also causes….
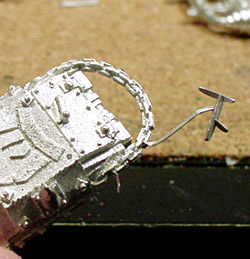
 Flash. This is usually metal sticking out of the model where it shouldn’t be. Flash isn’t as common on plastic kits as they are on metal, mainly due to the differences in how they’re made. Flash that does happen can usually be carved or sanded off of the piece while being careful not to remove areas that shouldn’t. I’ve removed plenty of bolts and wires because of inattentive flash removal.
Technique: Removal of flash and mold lines on plastic is much easier than metals because it’s softer. This means you have to be a bit more careful in removing it though. I usually use one of two processes to remove it. Adzing, which is basically scraping the edge of an X-Acto blade along the flash/mould line at a 90 degree angle. Or, if the defect is really large or a there’s a huge difference in the mould alignment, sanding is usually your best bet here. This is where having a small set of jewelers or mirco-files come in handy. I’ve also created specialized sanding sticks by cutting emery boards into different shapes or gluing sandpaper to wood sticks or pieces of plastic.
EXPERIENCE TIP: Removing mould lines is the most tedious part of doing up your model (the right way). It can easily be rushed or even passed by because you don’t want to do it, it’s much more fun to glue and paint. Many mould lines even look like they’ll disappear by using a little more paint. This is true in some cases, but not many. If you use the drybrushing technique (which is very common), mould lines will jump out like a horrible surprise party you didn’t want to attend.
Once you start cleaning up your models correctly you’ll start to notice it on other models. It will be a glaring ommision of detail as you progress with your skill. If you plan to enter competitions (especially any with some talent involved), mold lines will almost ALWAYS knock you out of any running. Of course, if you’re OK with it, that’s fine. Just be aware if you plan to be competitive, it’s good to start this habit early.
After you’ve cleaned up all your parts (sounds a little dirty) it’s time to assemble your model!.