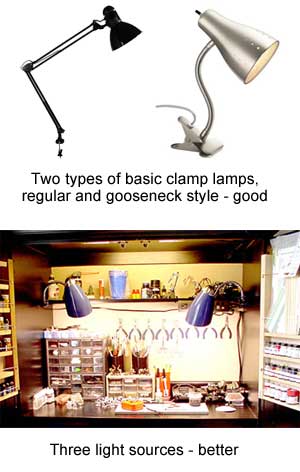
Of course you’ll need a place to do this crazy thing. Your own situations will dictate how much room you can devote to your hobby. A kitchen table will work, an old table in a separate room with a goose-neck lamp is better, a dedicated hobby room is the best. I luckily have dedicated hobby room in our home. The best thing you can do with any work area is to work smart by keeping the things you need organized and close at hand.
If you need to hijack the kitchen table and can’t leave your workspace set up all the time I would suggest two small tackle boxes as they’re really cheap. One with the tools and supplies for assembly and another strictly for painting. This way you’re not fumbling around your pliers or fishing through needle files to get to your brushes.
 Decent lighting is another consideration. The more light the better. I use three lights in my cabinet. One from above and two color corrected daylight bulbs in gooseneck lamps from either side. This helps with unwanted shadows when you’re trying to see what you’re doing. I know not everyone is going to be able to accomplish this amount of lighting but even a single clamp-on lamp with a 60 watt “daylight” bulb is a considerable improvement from that lamp on an end table in living room or a ceiling light in the kitchen – and once again, they can both be had for probably $10-$13 total.
Try to set up your work area so all of your tools/supplies you’ll need for that session are within arms reach. Time and experience will tell you what you use most.
The assembly stage of modeling is the messiest and can cause some problems with the painting. It’s magical sometimes how dust and debris from sanding can instantly appear on your new paint job, just before it dries. Try to keep the immediate area somewhat cleaned up. My old set up uses a separate keyboard tray that slides underneath the main workspace. This allowed me to leave stuff on it and slide it out of the way so I can paint, keeping the “assembly” area separated from my painting area. My new arrangement has completely separate painting and assembly areas.

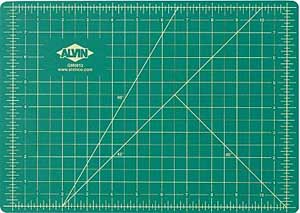
When you start cutting you’ll need to put something down to protect your surface unless you’re using and old desk or table no on cares about. I could do that with my cabinet but I want this to last a long time so I purchased what’s called a “self healing cutting mat.” It’s a rubber mat made for the design/art and craft/quilting market. When cut into, the rubber closes back up so you don’t see any cuts in the mat. It’s thick enough to protect most surfaces and can be found in most craft stores near the fabrics section. Some are green, some are grey, some are sold as a “Rotary Cutting Mat” — color doesn’t matter, it’s the same thing, different name. Some even have measurements and basic angles printed right on them making some tasks easier. I highly recommend one of these as they’re not that expensive and will save your work surface from the ravages of time.