
Detailed Masking for Airbrushing
I’m considering this a lesson learned and don’t mind passing this along 🙂
When I started painting the large aquilla on the top deck I was originally going to mask it out and airbrush it in layers. After looking at it for a few minutes I decided to use a brush instead thinking how difficult masking this off would be and how long it would take. Stoopid me.
I started with a brush and tried my hardest to make the layers even and without brush marks. The foundation color, Deneb Stone, went on ok. A little sloppy but figured the next two colors would compensate for this. I put down two layers of Deneb Stone, then two layers of Bleached Bone. Because of the lighter colors over black primer, it was nearly impossible to achieve a smooth finish before hitting the Skull White. I had almost four hours into just the aquilla.
This started me thinking about how long would it really have taken to mask off the intricate aquilla. Well, I found out tonight. A little over an hour to do both. It took me another 10 minutes to put down two layers of Skull White and 15 minutes to thoroughly clean my airbrush, another 5 to remove the masking tape. I’m assuming with two more colors to apply and dry, those would have taken about another 30 minutes. This would have been a total of around two hours. I had already wasted 4 hours on brush work (grrr) so I’m assuming if I would have started masking instead of painting, I would have saved around 3+ hours on it.
So, what do I do? Turn it into a tutorial! Detail masking for airbrushing.
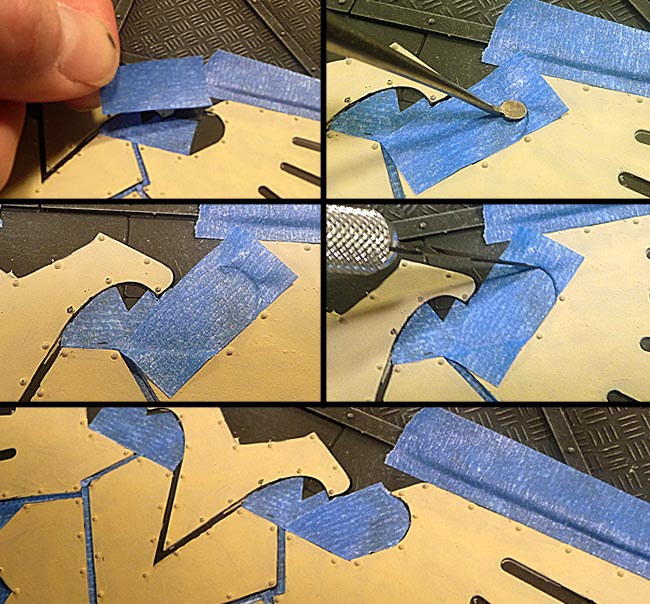
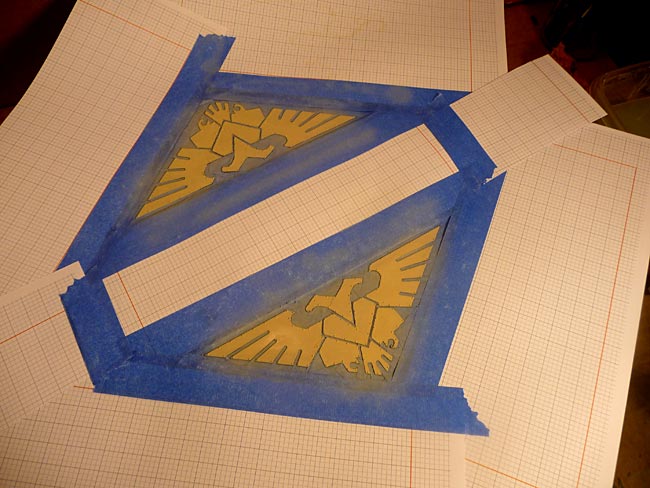
Here’s about halfway through the first aquilla, pretty intricate – and a little daunting.

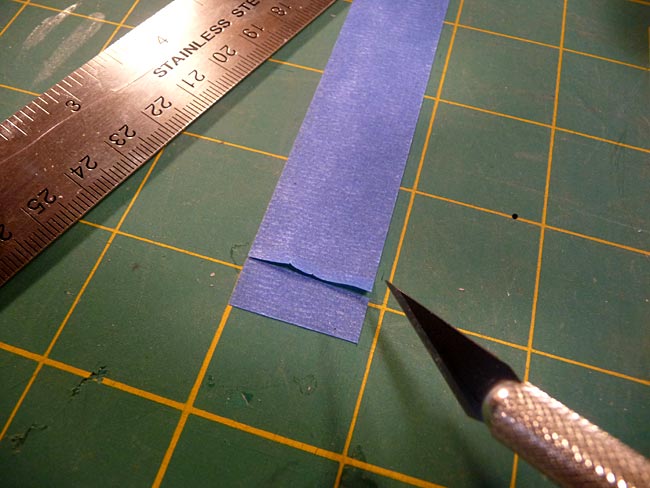
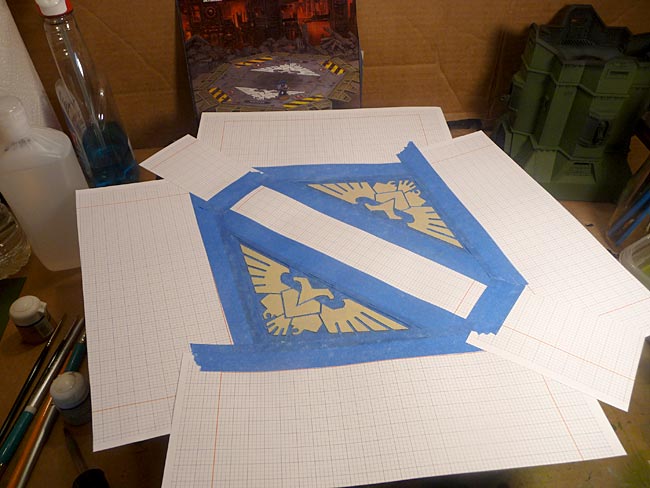
I’m using lo-tac blue painters tape. I stick it down lightly to my self-healing cutting mat. I use a steel rule to cut the skinny channel sized pieces of tape. I cut angled pieces and apply them to the edges and push them into place using a rounded end dental sculpting tool. This is really easy, pushing the tape into place and making sure it fits snuggly against the edges of the raised aquilla.
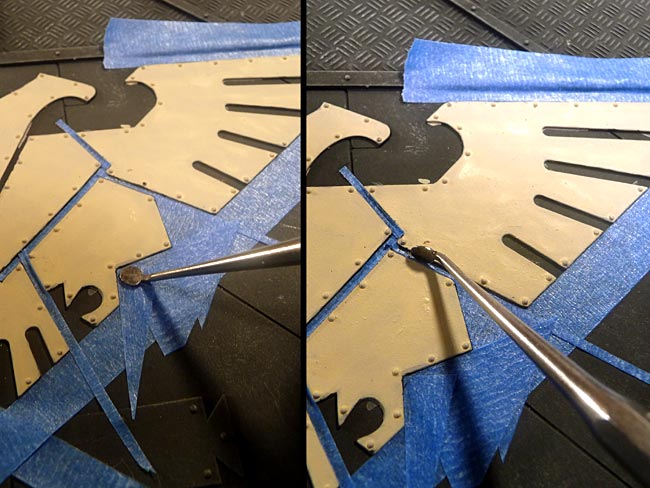
The next tip I want to show is how to apply the tape around the curves – the most difficult part. Cut a piece of tape larger than the area you’re going to mask off and gently stick it in place. Use the dental tool to push the tape into the corner. This is similar to copper tooling (do they still do that in schools?). The tape it flexible enough and should form itself fairly well to the shape. Use a sharp exacto to trim out the shape, erring on the higher side of the lip. Take care to move slowly as the blade can slip and cut into other areas (I did it a few times too)
Here’s the detail masked aquillas.
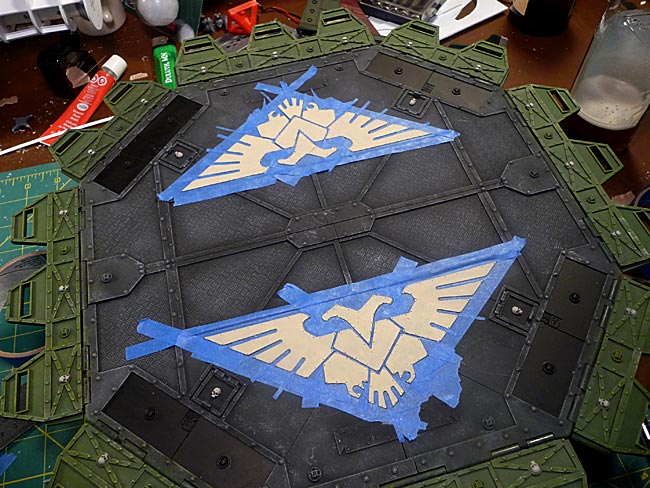
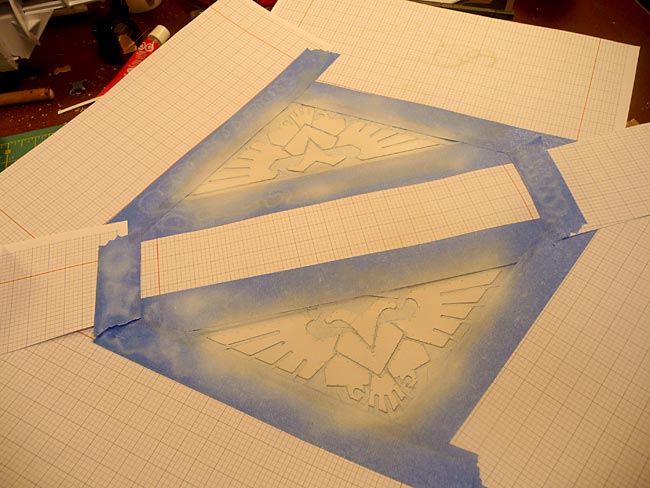
Then the rest of the landing pad is taped/papered off to prevent overspray.
I re-coated the squilla in Bleached Bone to smooth out the surface before applying the white.
Then applied two layers of Skull White.
Here’s the skyshield with the masking tape removed and a closeup.
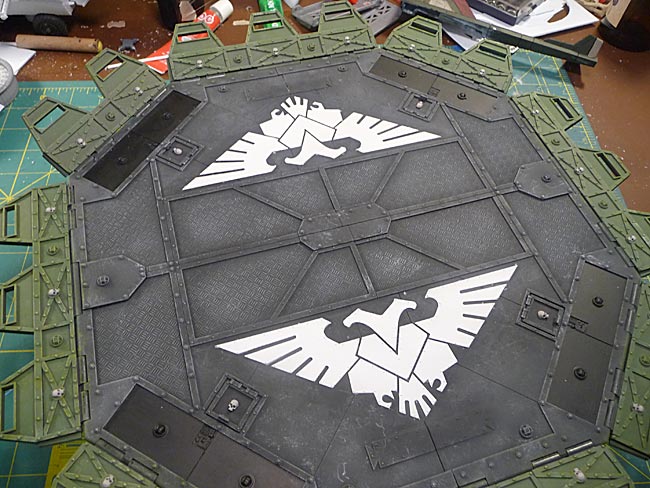
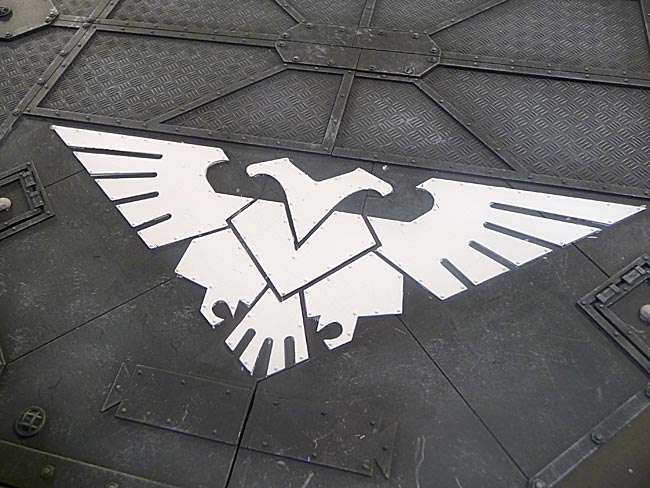
A nice, even, and solid white. A few small spots that will need touchup but these are actually from when I was using a brush.:)
The next step will be the chevroned panels, then I’ll do the weathering.
Later!

