
Big Mek Battle vs Uberdark – Wazdakka – Hot Exhaust Tutorial
Ok Kids! Tutorial Time!
(remember this when you’re voting, did uber ever give ya tutorials? Hmmmm?)
Figured I’d give the Forgeworld rusting exhaust technique a whirl. I love them for giving good step by step instructions. I hate them for making it look so damn easy! I gave it a shot and learned a few things along the way, I’ll try to impart what learned here.
There are a few things listed in the Forgeworld Masterclass book that I didn’t have on hand so I made do with what I had laying around. First and foremost was the weathering powders. I plan on getting some eventually but for now I used the pastel chalks I picked up a few years ago.

I think $12 at the local Michaels craft store. The book calls for rust colored weathering powders but I couldn’t find one close enough so I made my own from three of the colors I did have. Back scraping the chalk sticks with an xacto made short work and lots of powder.

I “mixed” these three colors together in a small wax paper cup to give me the final “rust” colored weathering powder.

Forgeworld used Scorched Brown (which is really the same as Burnt Umber as I found out later) as a base color and mixed the weathering pigment right into the paint. It did lighten it up a bit and make it look more “rusty” but not in the orangey rust way.

BTW: This looks almost exactly like the Testors rust colored enamel paint I’ve been a fan of for nearly 35 years. Very nice to see I can do this now in acrylic.
Here are the pipes on one side completely painted in the new pigmented mix. I didn’t apply this super carefully or evenly as I’m assuming this will give the rust color some variation to break up the monotonous rust tone along the length of the exhausts.

After this layer has dried Forgeworld uses a Burnt Umber oil wash to wet down the area and bring some definition to the shadowed areas – and to give the weathering powders something to stick to when adding the rust details. I didn’t have any oil so I used, ta da, Scorched Brown as the wash. I added a little bit of matte medium to it to give it some longevity on the model as you’re supposed to put the powder down on a wet surface and then blend it in. This seemed to work ok for me. I did this in sections to make sure things didn’t dry up too soon. Here’s the finished results from one side…
Just enough orangey breakup to make it a little interesting. Too bad I will completely obliterate this with the airbrush later (oh well, one of my lessons learned today.)

Now, even though it happened over the course of two hours or so, I completely forgot to take pics of the next 3 steps. (yes, I can be quite the dumbass sometimes) Boltgun and Mithril silver is dry brushed over the shrouds. I realized a little late that my paint was way too thick when I did the dry brushing. Another lesson learned.
Next, They use a series of yellow, red and purple inks to impart the heat coloring effects on the outer exhaust shrouds. I did this, layer by layer, over the course of two hours since inks dry very slowly and the humidity is high here today (raining out now).Soooooo, it comes to longer story shorter.
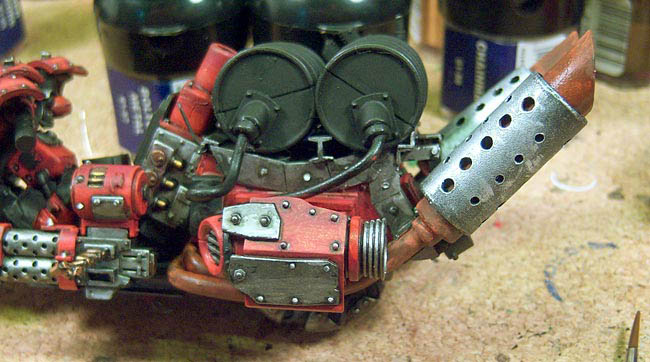
I heat treated the exhaust shrouds with the inks then man handled my borrowed airbrush for the first time and airbrushed the exhaust soot over the ends of the pipes.I finished this off with a stippling of Chaos Black on the very ends of the pipes and a light stippling of Scorched Brown and Vermin Brown to add a bit of rust and flaking to the outer shrouds. Here’s the finished results…


There are a few things I wished had worked better. The drybrushing mistake is kinda noobish (for me) and the inks are tough to work with when they’re so thin they always gravitate down – in this case, all the color kept pooling up on the underside of the pipe instead of sitting on top. Not sure if I thinned it down too much or what. I eventually ended up mixing the inks with a little matte medium to try and add a bit of “stick” to the color.
I also learned a few things about airbrushing that I won’t go into here – for another post.
Well, off to do more details, I hope you enjoyed the tutorial.
Later!


