Ohhh, Another Project!

Ok, ok. For those of you new here to Big Shoota Studios, I never really only work on one project or mini at a time. There’s usually 4-5 things in various states of completion. While I was finishing up my grot mob, I had started building a ton of the boyz from the new Armageddon box set (boyz before toys). I’ll start posting on those soon. While all of that was happening, I had ordered a set of 3D printed battle terrain and it finally arrived.
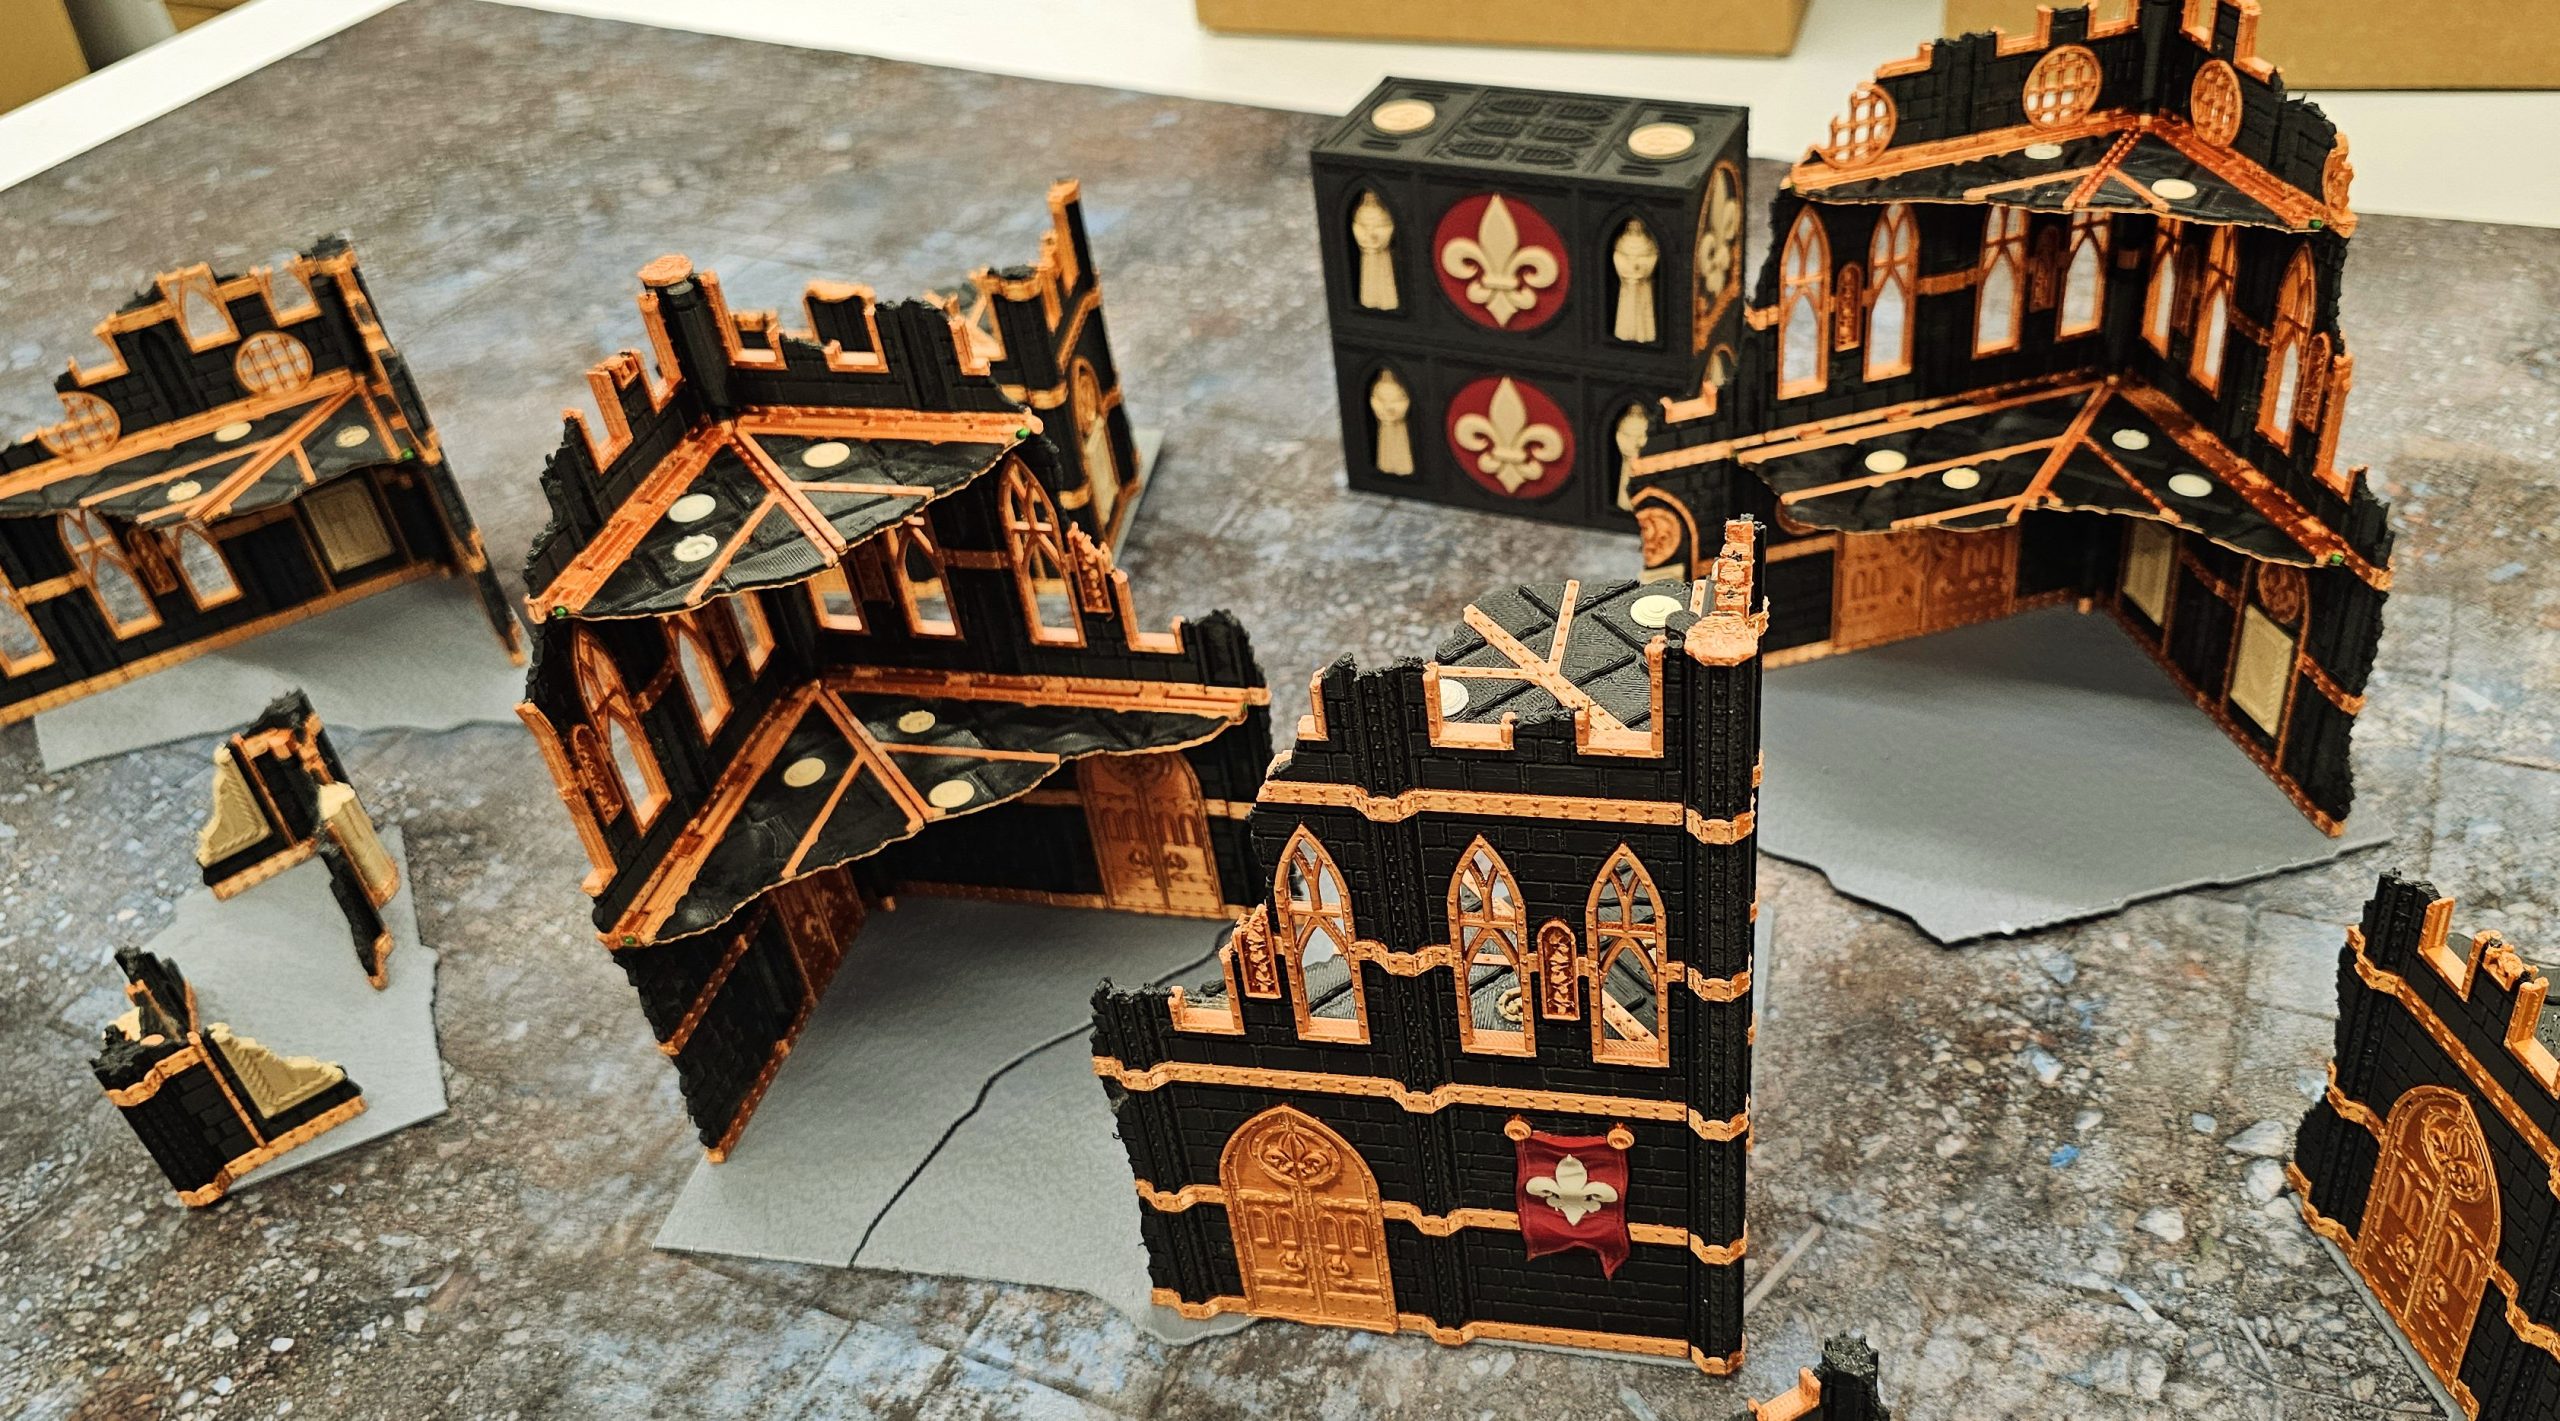
The new color printed ruins from EA & J Labs came in. I went with the “11th Edition Folding Competitive Battle Nun Edition (0.01 Layers) Best Detail” to go with my yet to be painted Adepta Sororitas. From here on out I will refer to it as the Sisters of Battle Playset. Printed in a black and metallic Halloween orange colors, it’s got a lot of visual impact on the table along with red and cream colored banners and statues. I knew I was going to weather these as soon as I made the purchase and it took about 4 weeks for them to arrive as they were printed when ordered.
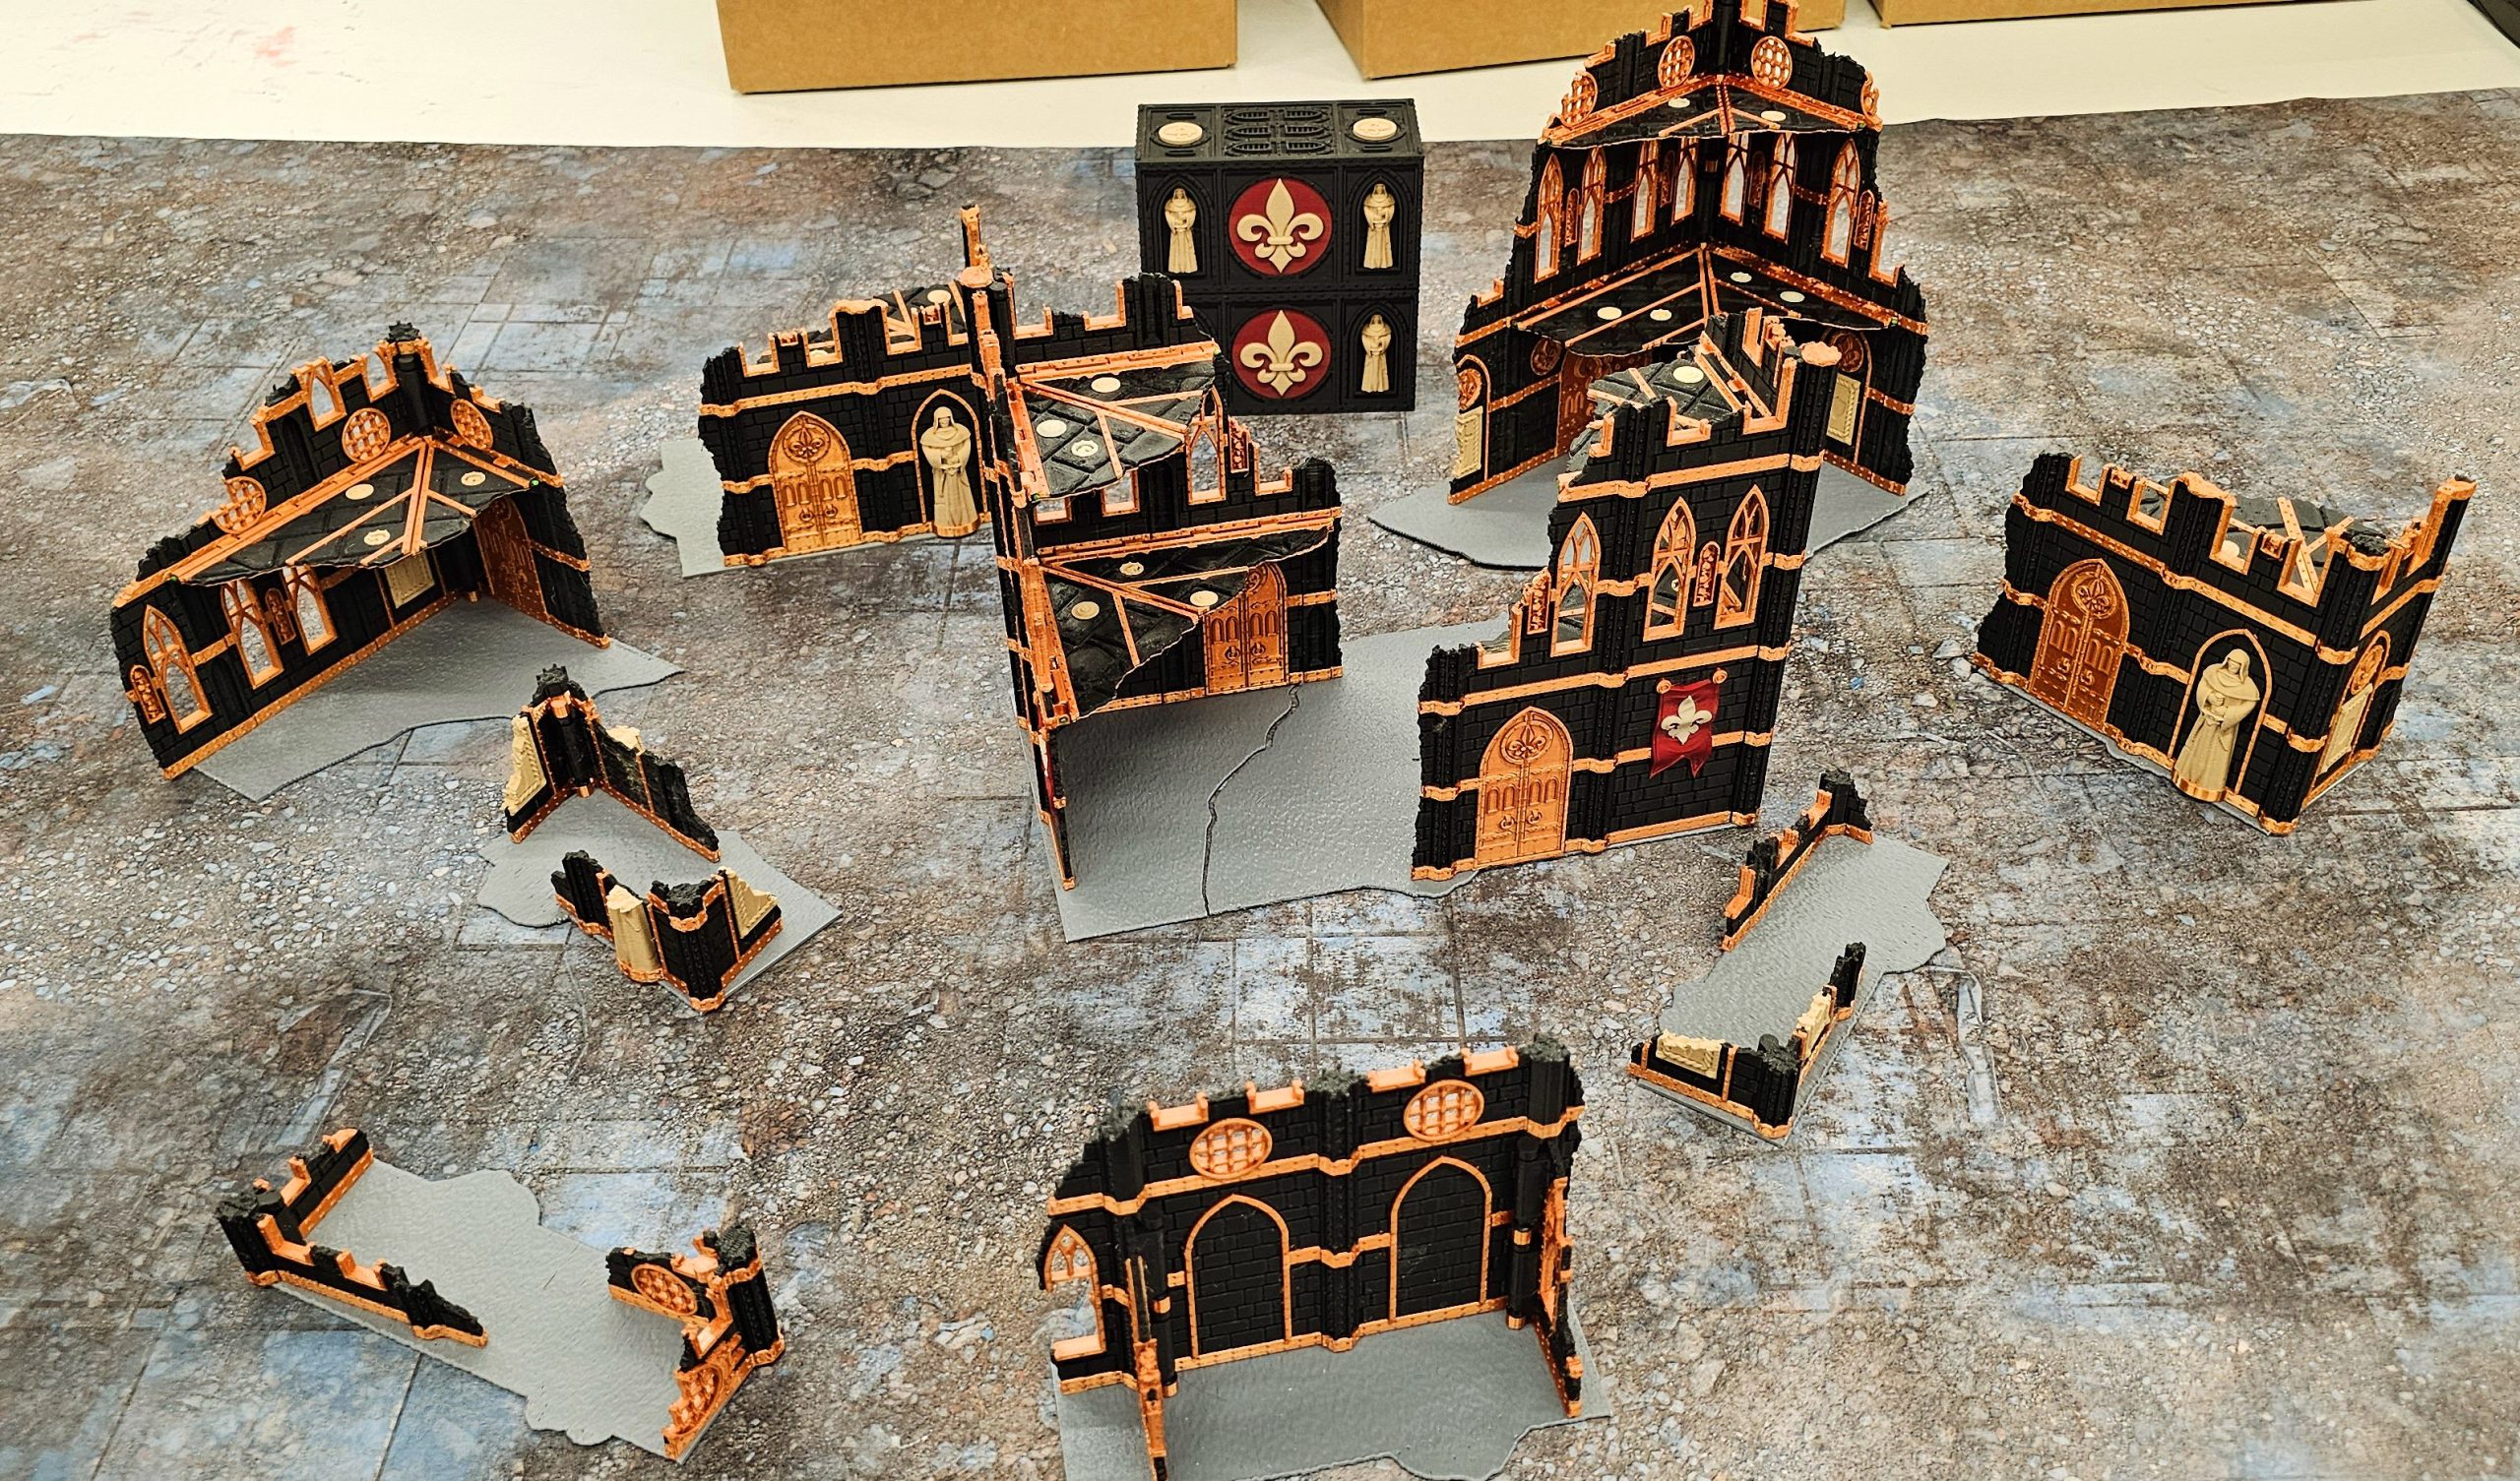
Once they arrived and I had a chance to clean them up, I realized I had to carefully think about how to weather them.
First off, who has ever seen black brick? It’s not a very common color for masonry. I did some Google research and confirmed what I was thinking of doing. I want to keep the bricks “black”, but need to find a way to visually separate them with the mortar. I want the mortar to be lighter, of course, but not starkly so. A medium-dark gray should do the trick. I want to define the brickwork subtly, not draw a white line around each brick. This would just simply create “noise’ that wouldn’t read like “brick wall” and more like “static TV screen”.
The bricks won’t actually stay “black” either. I want to give them some depth and interest by subtly sponging them with various shades of very dark gray. The idea is they have been colored a bit by the environment. Dirt splashed up from rain, dust clouds from falling rubble, or even smokey soot as buildings burn. All of these factors change the black brick surface into a muted kaleidoscope of browns, grays, and ashen colors.
The environmental effects will also vary across the surface of the buildings. Most rain splatter happens at the lowest parts. Explosion and impact dust will be a bit higher, say mid first level and up. Smoke tends to affect the higher portions because, well, smoke rises. So, there should be a bit of a gradient from brown and sandy tones at the bottom, moving up to sandy and more ash/concrete dust grays in the middle, to black, wispy smoke stains towards the top.
See what goes through my head as I stare at a project for a few minutes?
Another item that will need its own TLC in weathering is the gold/brass banding. I’m not a huge fan of this particular “gold” as it’s way too orangy – which strikes me as an odd choice. I plan on toning this down using a silver acrylic paint marker to basically highlight a lot of the gold surface area. I want it to read more “brass” than “gold”. The silver will help bring that about. Once that’s completed, the rest of the brass treatment will by a simple grimy brown wash.
I also want to paint the template bases so they more or less blend into the urban rubble playmat I purchased to go with this set. They’re currently just a putty grey color and shouldn’t be too difficult to paint up – though I’m a little surprised at how much blue there is in the playmat.
Looking forward to this project and being able to bring a new, exciting looking board to Waaagh!Fest! next year.
Later!